|
Navigation: Writing Help Topics > Inserting Objects > Inserting a Horizontal Line |
Send comments on this topic.
|
|
Navigation: Writing Help Topics > Inserting Objects > Inserting a Horizontal Line |
Send comments on this topic.
|
1.In the word processor, put the cursor where you want to insert a horizontal line.
2.On the Insert tab, in the Objects group, click Horizontal Line.
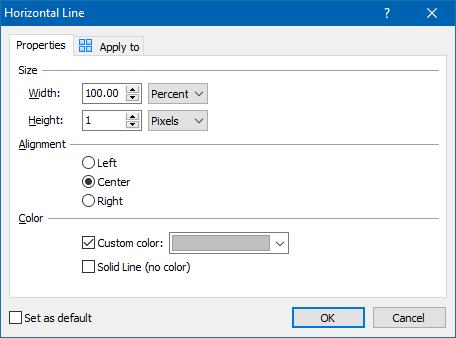
1.In the word processor, double-click on the horizontal line that you want to edit.
2.In the Horizontal Line dialog, specify the settings (e.g. width, height, color, etc.) according to your needs.
3.Click OK.
Editing settings of a horizontal line
HelpSmith allows you to apply settings not only to an individual horizontal line, but also to other horizontal lines contained in the current topic, or in multiple topics.
So you can define a single style for the horizontal lines in your help project.
1.In the word processor, double-click on the horizontal line that you want to edit.
2.In the Horizontal Line dialog, specify the settings according to your needs.
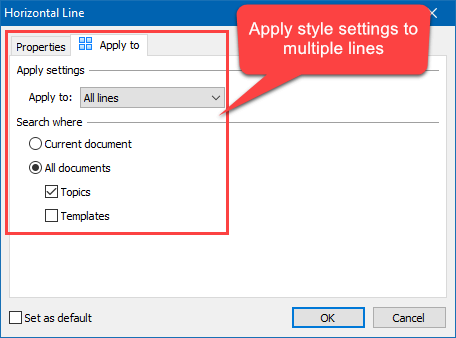
3.On the Apply To tab, specify the horizontal lines to which you want to apply the settings.
For example, you can apply settings to the selected horizontal line only, or to all the horizontal lines in the current topic, or in all the topics in the help project. If you have different sets of horizontal lines (with different style settings), you apply the new settings only to the same horizontal lines.
4.Click OK.
Applying settings to multiple lines
Important: Before using the Apply To feature to update horizontal lines in multiple topics, it is recommended that you save your help project first (by clicking File|Save). So you will be able to see the modified topics in the Project Manager, review the changes, and thus prevent any undesired results.
Copyright © 2007-2024 HelpSmith.com