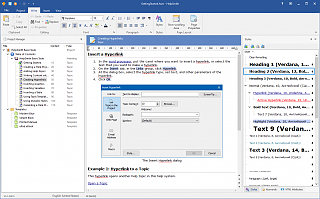
Using Templates to Customize the Appearance of Help Topics
The Templates feature available in HelpSmith allows you to easily customize the appearance of help topics in various documentation formats that you can create including Web Help, HTML Help (CHM), PDF, or ePub eBook.
While editing your help project, you can add any number of templates that you can apply to all topics in a specific output format, or to individual topics only.
Below are the instructions explaining how you can use templates in your help project.
How Templates Work
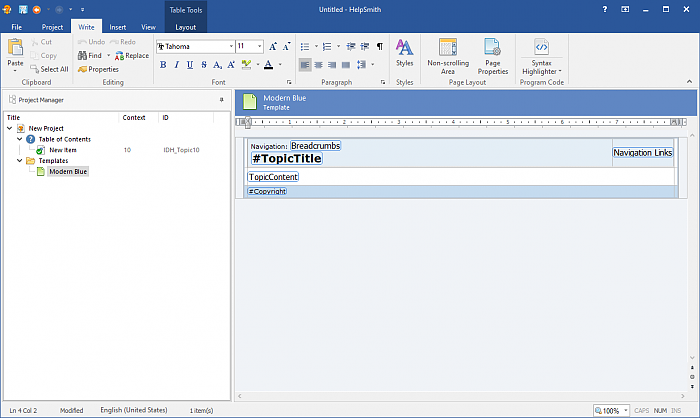
A template is a regular document that you can edit similarly to a topic in the HelpSmith's word processor. However, a template usually contains only the common parts that will apply to the topics during the compilation process when you produce a CHM file, Web Help, or other documentation formats.
For example, a template usually contains the following document parts:
- Header area with the #TopicTitle variable that will display the title of the actual topic, breadcrumb object, and navigation links.
- TopicContent placeholder - a mandatory placeholder that defines the place where you want to insert the actual topic content during the compilation process.
- Footer area that can contain a copyright string, a widget with social comments (in a Web Help system), and so on.
Remark: It should be noted that while you can create a custom design for a template, HelpSmith also includes a set of pre-built templates that you can simply add to your help project, and then modify the templates according to your own needs.
How to Add a New Template
HelpSmith allows you to add any number of templates to your help project.
- On the Project tab, in the "Topics & Templates" group, click the lower half of the Add button.
- In the popup menu, click Add Template.
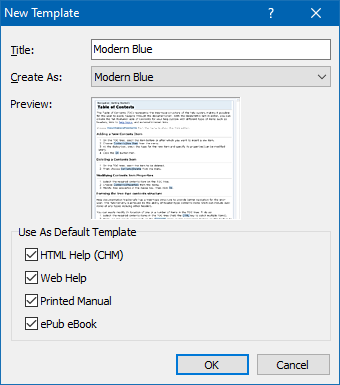
- In the Title box, enter a name for your template.
- In the "Create As" box, select a pre-built template (that you will be able to modify later).
- Specify the output formats (e.g. HTML Help, Web Help, etc.) in which you want to apply this template to all topics by default.
- Click OK.
Thus, you can add a template and set it as the default template for one or several output formats, which means that it will apply to all the topics in the selected output formats during the project compilation process. To change these settings for an existing template, you can simply double-click on the template and edit its properties.
How to Edit a Template
You can edit an existing template to create the desired style of your help topics.
To open a template for editing:
- In the Project Manager, under the Templates node, select the template that you need.
Since a template is a regular document that can be edited directly in the HelpSmith's word processor, it allows you to use any objects in it, such as hyperlinks, images, tables, variables, setup the non-scrolling area, etc.
The TopicContent Placeholder
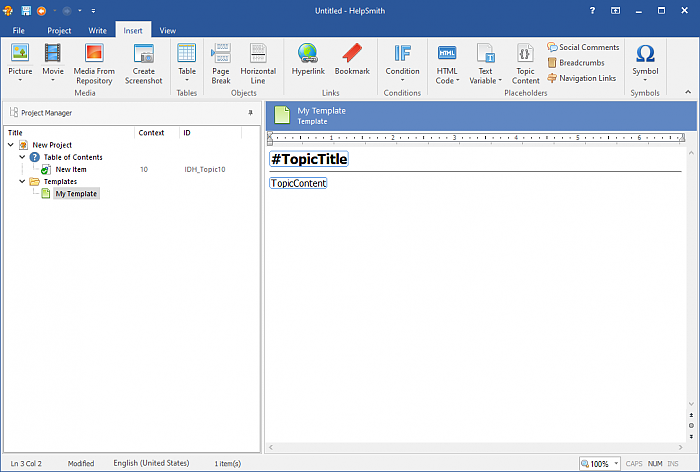
Please note that any template must contain the TopicContent placeholder that defines the place where the actual topic content will be inserted during the project compilation.
To Insert the TopicContent Placeholder Into a Template:
- In Project Manager, under the Templates node, select the template that you need.
- In the word processor, put the text cursor where you want to insert the TopicContent placeholder.
- On the Insert tab, in the Placeholders group, click TopicContent.
Remark: If a template does not contain a TopicContent placeholder, the template will be ignored during the project compilation process.
How to Apply a Template to Individual Topics
While you can apply a default template to all the topics in a specific output format (as explained above), you may also need to apply a template to individual topics only.
- In Project Manager, select the topics to which you want to apply a template.
Remark: You can select multiple topics by clicking on them while holding down the Ctrl key. - On the Project tab, in the "Topics & Templates" group, click Properties.
- In the Topic Properties dialog, click the Templates button.
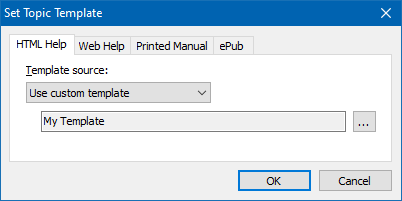
- In the "Set Topic Template" dialog, on the appropriate tab (e.g. HTML Help, Web Help, etc.), specify the template settings that you need.
Remark: Here you can define if the selected topic(s) should use the default template, no template, or a special template. - Click OK.
Compile Your Help Project to Test Your Template
You can test your templates by compiling your help project (click: Project|Compile, or press F9) to the desired output help formats.
Thus, you can see that HelpSmith makes it possible for you to create a single appearance for your help topics easily, and also to customize an existing design without the need to edit each and every topic in your help project.

