The New Web Help System Format Overview
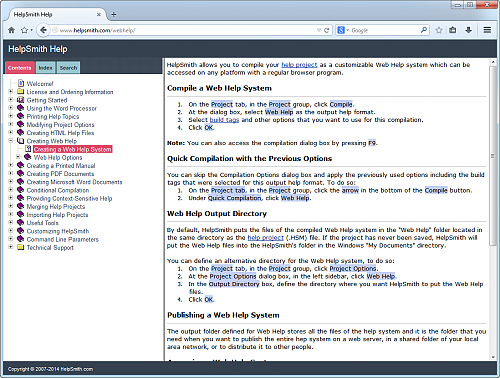
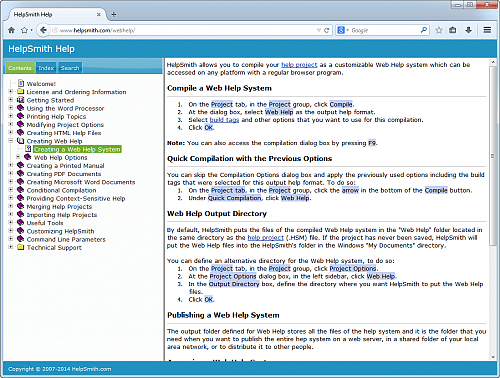
HelpSmith 4.0 introduces a completely redesigned Web Help system format. The main idea behind the new Web Help was to implement a complete and customizable solution for technical writers, developers, and webmasters who need to create and publish technical documentation on a website, in the corporate local area network, or distribute such a help system with a desktop application.
Working on a help authoring tool, we understand that a professional Web Help system should have flexible customization possibilities for its user interface, easy navigation, and a rich set of features including full-text search, Index tool, etc. Also, Web Help should allow developers to easily integrate it with a website or application to provide context-sensitive Help. Besides that, a Web Help system should be compatible with all of the modern browser programs. All of these aspects were taken into account when developing the new Web Help format and this article will demonstrate its key features and benefits.
Customization of the Web Help System Appearance
HelpSmith includes flexible options allowing you to customize the appearance of a web help system. First of all, let's take a look at how you can customize the appearance of different elements such as the navigation pane (the area that contains the Table of Contents, Index, and Search tabs), and the appearance of the top and bottom frames. You can access these appearance settings at:
Project|Options->Web Help->Appearance
Here you can simply apply one of the ready-to-use style schemes that will change the view of the entire help system. However, you can also edit appearance settings of individual elements. To customize an element, find its name in the "Styles" list and double-click on it. Depending on the selected element (e.g. top frame's background or tab styles), you will be able to change its color, or font settings in different states of that element. The possibility of editing all of these individual settings allows you to completely customize the common style of your Web Help system according to your own needs.
Customization of the Web Help Layout
The new Web Help format also allows you to customize the main layout of the help system. To access the layout settings, click the menu command: Project|Options->Web Help->Layout. Here you can modify the size of the navigation pane and some other elements.
The main options to which we would like to pay attention is the possibility to customize the main top frame and the bottom frame areas of the web help system: you can control whether to display top and bottom frames, define frame height values, and also to define content that the top or bottom frame should display.
By default, the frames display default (automatically generated) content which is quite simple. But HelpSmith offers you the following ways for customizing the top and bottom frames:
- Using a help topic as the frame source - this option implies that add a special help topic to your help project and then select it here, so the topic will be used as the source of the frame's content. In this case, you will be able to edit the frame's content directly in the HelpSmith's word processor. Of course, you can simply not include that topic to the Table of Contents, so your users will not see it among other regular topics of the help system;
- Using an external page - this option allows you to use a web page instead of the default top or bottom frame. For example, your Web Help system and website can even use that same web page as the heading area, which is quite useful. In this case, you can simply define the external page URL and HelpSmith will use it as the source of the frame's content. Please note that the linked web page is not embedded into the compiled web help system and should be available for the help system to work properly.
Table of Contents Behavior and Custom Icons
Other Web Help options that you can access at: Project|Options->Web Help->Contents allow you to change some behavior settings for the Table of Contents. For example, if you prefer to have only one TOC heading open at a time, you can control it here.
Moreover, HelpSmith now allows you to define custom icons for the Table of Contents tree in Web Help. To do so, simply check the "Use custom icons" option and then select icons for the TOC entries of different types and states. As usually, all the images that you use in your HelpSmith project are stored and accessible through a single media repository.
Better Search and Relevant Search Results
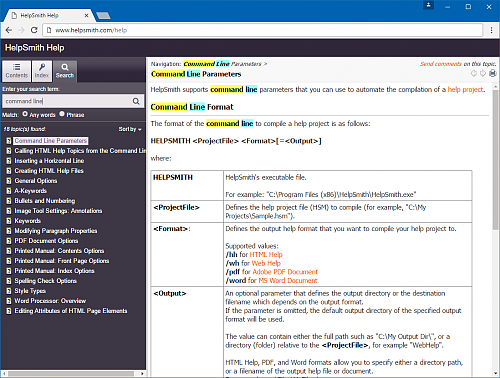
The new version of Web Help which is available in the latest HelpSmith release includes a built-in Search tool which is also based on a completely new full-text search engine. Now the built-in Search lets the user to quickly find either individual keywords or whole phrases in a big number of help topics. The Search results are shown according to their relevance, and the found keywords are highlighted in the currently open help topic. The topics from the search results that the user has already viewed are also highlighted with a different color. Thus, the improved Search tool will let users of your Web Help system to quickly find the information they are looking for.
As the developer of the help system, you can also change some settings of the Search tool. You can access these settings at: Project|Options->Web Help->Search. Here you can enable or disable the Search tool, define a list of keywords that should be excluded from search, and also change the way the help system highlights found keywords in topic text.
Improved Keyword Index Tool
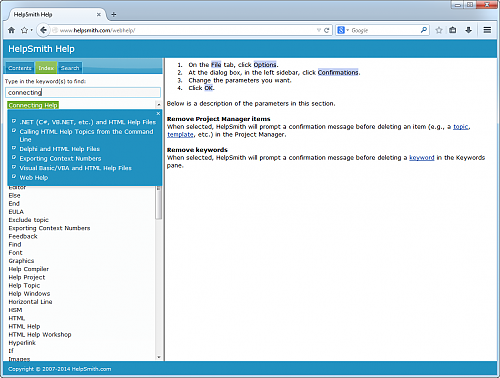
The Index tool allows the user to quickly find a keyword and all the topics associated with that keyword. Unlike the Search tool that works automatically, the Index is based on the keyword association that you create when developing a help system. The keyword tool in HelpSmith allows you to build the Index tree and associate a keyword with one or more help topics manually. The improved keyword tool in Web Help now allows users to type in a keyword that they want to find in a special field. When clicking on a keyword which is associated with more than one help topic, Web Help will display the list of these help topics in a popup window. So the alphabetical Index is another tool that lets your users to easily find any information in your Web Help system.
Providing Context-Sensitive Help
When it comes to integrating a Web Help system with your website, web application, or even with a desktop application, HelpSmith offers you an easy way to accomplish that task. A Web Help system generated with HelpSmith supports a set of URL parameters that makes it possible for you to create hyperlinks from your website or application to your Web Help system. From a hyperlink you can open a specific help topic by its Id, Context Id, or directly by its filename. When needed, these parameters allow you to pass the anchor (or bookmark name), so the help system can open a specific topic and scroll to a part of text in it. Thus, providing Context-Sensitive Help is also an easy-to-do task.
You can find the full list of the mentioned URL parameters in HelpSmith documentation by visiting this link.
Compatibility with All Modern Web Browsers
Providing a Web Help system that correctly works in all modern web browsers like Internet Explorer, Firefox, Chrome, Opera, Safari is also an important task. HelpSmith developers implemented the new Web Help in HelpSmith 4.0 following strict W3C standards, which solves most compatibility issues in different browser programs. The compatibility issues is one more advantage to use a help authoring tool like HelpSmith for creating a Web Help system since the developers of the product have already tested everything and you get the possibility to concentrate on writing.
Translating a Web Help System into Other Languages
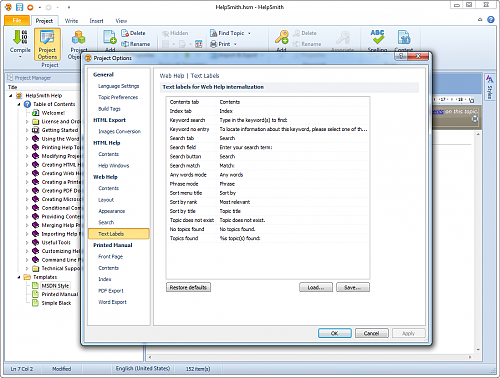
HelpSmith makes it possible to translate a help project into other languages. The main solution consists in the use of a built-in Project Merge feature that can work in different modes, which is fully described in HelpSmith's manual. As to the Web Help system format, HelpSmith allows you to change the default text labels which are used in the help system's layout to describe different elements, controls, etc. Thus, you can access these settings at Project|Options->Web Help->Text Labels and change (or translate) the default text labels according with your needs.

