HelpSmith Help
Logo Image

Using the Image Tool / Editing Image Properties /

Image Properties: Cursors

Send comments on this topic

← Previous Next →

The functionality described in this topic is available in HelpSmith Professional (or higher) edition only.


Edit Cursors Settings


1.In the Image Tool, on the toolbar, click Image Properties.

2.On the Cursors tab, modify the settings according with your needs.

3.Click OK.


Cursors Settings


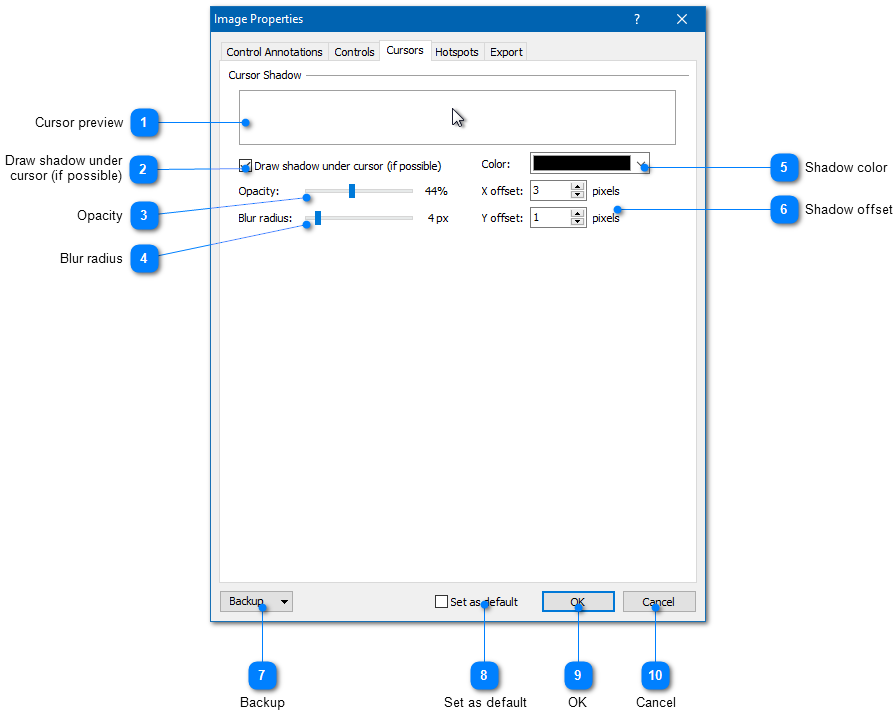
On this tab, you can customize the appearance of the mouse cursor that you can add to the screenshot.


Cursor preview

Displays the cursor with current settings.


Draw shadow under cursor (if possible)

If selected, shadow will be added to the cursor image.


Opacity

Specifies the opacity level (in percent) of the cursor shadow.


Blur radius

Specifies the blur radius (in pixels) to apply to the cursor shadow.


Shadow color

Specifies the color of the cursor shadow.


Shadow offset

Specifies the left and top offset of the shadow relative to the cursor.


Backup

Allows you to export (or import) image properties to (or from) a file. Also, you can reset the image properties to the default state.


Set as default

If selected, the current image properties will apply to a new image as default.


OK

Applies the current settings and closes the dialog window.


Cancel

Discards the changes to the settings and closes the dialog window.


Related Links


Image Tool: Overview

Inserting a Screenshot

Adding Annotations to an Image

Exporting Control Annotations to the Topic

Using Control Annotations

Using Hotspots

Editing Image Properties


Copyright © 2007-2024 HelpSmith.com