|
Using the Image Tool / Inserting a Screenshot |
Send comments on this topic |
The functionality described in this topic is available in HelpSmith Professional (or higher) edition only.
Insert a Screenshot into a Topic
1.In the word processor, put the text cursor where you want to insert a screenshot.
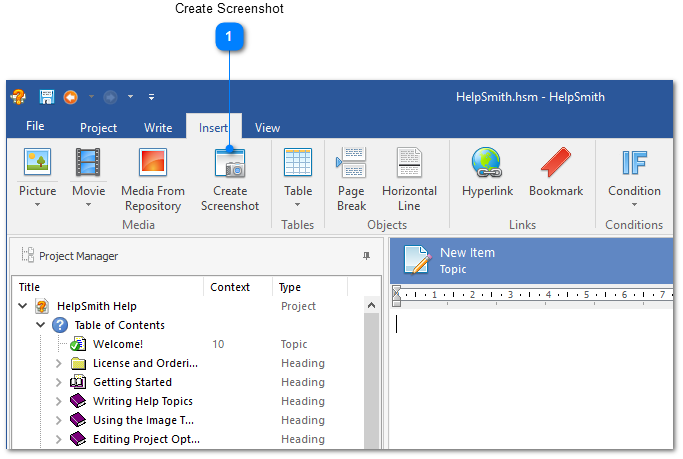
2.On the Insert tab, click Create Screenshot.
3.In the Image Tool, click the Capture by Mouse button.
4.Select the window that you want to capture and then Ctrl+Click on it.
5.Click OK.
Remark: Please note that when clicking on the Create Screenshot button, the Capture by Mouse mode can be activated automatically. In this case, you can immediately proceed to capture a screenshot.
|
Create Screenshot |
|
|
Opens the Image Tool window that allows you to capture a screenshot and insert it into the topic. |
|
|
|
|
Update a Screenshot Image
The Image Tool allows you to update the screenshot without modifying or removing annotations on it.
1.In the word processor, hover the mouse over the image with annotations that you want to update.
2.In the top-left corner of the image, click the Edit Image button.
3.In the Image Tool window, on the toolbar, click Replace Image.
4.In the drop-down menu, select the method that you want to use to replace the image, such as inserting the image from Clipboard, importing the image from file, or capturing a new screenshot.
Remark: When you update an image with this method, a new image file will be added to the project's Media Repository. To avoid this, you can update an existing image file in the Media Repository window directly. For more details, you can visit this topic.
Using the Capture Controls Option
When capturing a screenshot with the Image Tool, you can check or uncheck the Capture Controls button available on the toolbar. If this option is checked, the Image Tool will try to recognize user interface elements (such as buttons, input boxes, etc.) on the captured window and create control annotations for them automatically. Additionally, you can edit options related to the capture of controls in a dialog window.
Please note that while the Image Tool can recognize "window-based" controls in a desktop application, the Capture Controls option may not work for other types of controls including XAML-based UI, graphic controls in VCL, or elements on a web page in a browser since such controls are not accessible to the Image Tool. At the same time, you can still use the Image Tool to create documentation for web applications, and other types of applications.
For example, for a web application, you can use the Image Tool to create a screenshot of the browser window, remove unwanted parts of the image with the built-in Crop Tool (if necessary), and then add control annotations for the UI elements manually. Despite the Image Tool can automatically recognize controls for a desktop application, in many cases, you will prefer to delete a big number of automatically added annotations for all the recognized controls. Moreover, in some cases, it is also necessary to describe a group of controls under a single annotation, which implies working with the annotations manually.
Related Links
•Adding Annotations to an Image
•Exporting Control Annotations to the Topic
Copyright © 2007-2026 HelpSmith.com

